

Bathroom LED mirrors are a great way to spruce up a space; they’re both practical and stylish. Bathroom LED mirrors may be installed in two distinct ways. To begin, you’ll need to purchase a pre-made bathroom LED mirror and then install it in the bathroom of your choice. Installing light-emitting diode bulbs directly on your bathroom mirror is an option that may be more convenient for some. There is just one difference between the two approaches, and that is that anti-fog functions are included into most ready-made bathroom LED mirrors.
If you’re planning to add one to your space, then here are some things to keep in mind.
What is a bathroom LED mirror?
Bathroom mirrors include LED lamps. They provide a wide range of advantages. One of its benefits is that they may help to enhance the aesthetics of your bathroom, they may help you save money on your utility costs. That’s because LED lights consume less energy and last longer than incandescent lamps.
This approach involves placing LED lights in your mirror, so let’s take a brief look at the methods needed.
Gather your resources
Gather the necessary components before beginning to install bathroom LED lights in a mirror. It is essential that you have a bathroom mirror available for use throughout this operation. LED strip lights, a power supply unit, connectors, tape, and a measuring ruler are among the other supplies needed.
After preparing the components, begin by measuring the mirror. In order to establish the length of each mirror side, you will need to take this measurement.
Install
All the supplies are assumed to be in place. The next step is to begin the installation. The first step is to cut the length of strip light you require. It will be based on the previous measurements.
After that, wipe off the mirror with a glass cleaner to make it easier for the strip lights to adhere. Strip lights may now be installed one at a time by gently peeling off the adhesive coating. Make sure you take the time to tape the strips down for optimal outcomes.
Plug them into the power supply
Finally, the strip lights are connected to a power supply unit. If you don’t know much about it, you can always go online and find out.
Run a test on the mirror’s lit surface.
After connecting the LED strip lights to the power source, the following step is to test the system out. Plugging the power supply device into an electrical outlet is all you need to do.
Purchase them ready-made
Ready-made bathroom LED mirrors are often the easier and more aesthetic option for new bathrooms. The most common kind of mirror to be seen in bathrooms is a backlit one. They are referred to as “backlit” because of the LED lighting tubes that are positioned at the back of the mirror.
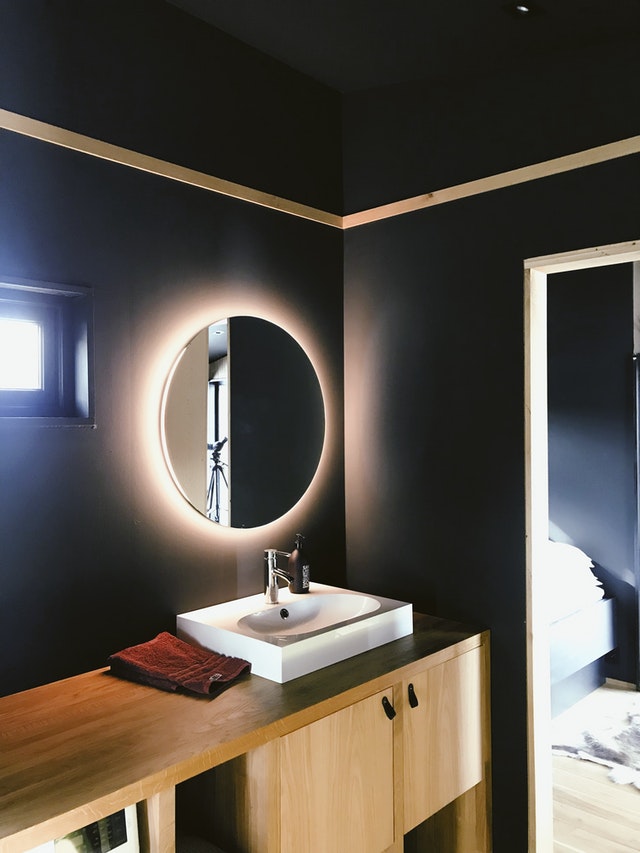
Bathroom Vanity Lighted Mirror in Round Shape
Installing a new LED mirror in your bathroom entails a few steps.
Measurement
Once the bathroom LED mirror has been unwrapped and its measurements taken, the installation procedure can be started. In order to get better results, consult the product’s instruction manual. Using the mirror’s measurements, you’ll need to drill holes in the wall for the brackets.
Install the wall brackets
Fixing the brackets to the wall is the next step after drilling the holes. Look in your handbook for instructions on how to accomplish this. If there isn’t, then just follow these instructions.
Mounting
The final step is to put the mirror on the brackets and see whether everything is in order. Once that’s done, you can begin putting wires into it and getting it powered up.